Photo Faulty PCM

Troubleshooting 2008 Ford Explorer PCM Problems

The Powertrain Control Module (PCM) in a 2008 Ford Explorer serves as the brain of the vehicle’s engine and transmission systems. This sophisticated electronic control unit is responsible for monitoring and managing various engine parameters, ensuring optimal performance, fuel efficiency, and emissions control. The PCM processes data from numerous sensors located throughout the vehicle, including the mass airflow sensor, throttle position sensor, and oxygen sensors.

By interpreting this data, the PCM can make real-time adjustments to fuel injection, ignition timing, and other critical functions to maintain the engine’s performance under varying conditions. In addition to its role in engine management, the PCM also communicates with other onboard systems, such as the anti-lock braking system (ABS) and the transmission control module (TCM). This interconnectedness means that any issues with the PCM can have far-reaching effects on the vehicle’s overall functionality.

For instance, if the PCM fails to receive accurate data from a sensor, it may trigger warning lights on the dashboard or lead to erratic engine behavior. Understanding the PCM’s role is crucial for diagnosing and addressing potential issues that may arise in a 2008 Ford Explorer.

Key Takeaways

  • The PCM in a 2008 Ford Explorer is a crucial component that controls various functions of the vehicle’s engine and transmission.
  • Common symptoms of PCM problems in a 2008 Ford Explorer include engine stalling, rough idling, and difficulty starting the vehicle.
  • Diagnostic tools such as OBD-II scanners and multimeters can be used to troubleshoot PCM problems in a 2008 Ford Explorer.
  • Steps for checking and testing the PCM in a 2008 Ford Explorer include inspecting for visible damage, checking for error codes, and performing voltage tests.
  • Addressing wiring and connection issues related to the PCM in a 2008 Ford Explorer is essential for ensuring proper functionality of the vehicle.

Common Symptoms of PCM Problems in a 2008 Ford Explorer

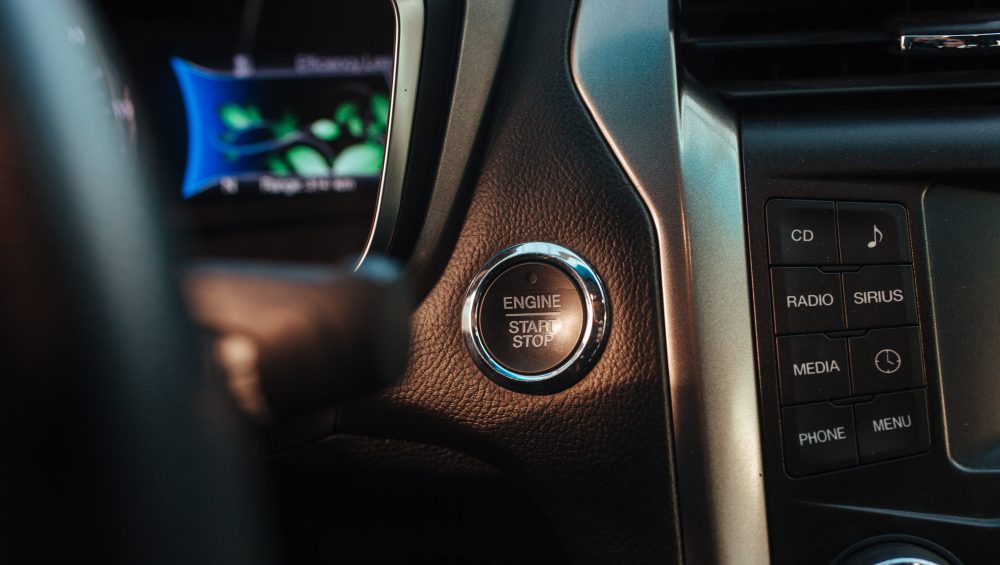
When the PCM in a 2008 Ford Explorer begins to malfunction, several symptoms may manifest, indicating that something is amiss. One of the most common signs of PCM problems is poor engine performance. Drivers may notice a decrease in acceleration, rough idling, or stalling while driving.

These symptoms often stem from incorrect fuel-air mixture adjustments or timing issues that the PCM is unable to manage effectively. In some cases, the vehicle may also experience difficulty starting, which can be attributed to the PCM’s failure to send the appropriate signals to the fuel injectors or ignition system. Another prevalent symptom of PCM issues is the illumination of warning lights on the dashboard.

The check engine light is particularly notorious for signaling problems related to the PCM. When this light activates, it indicates that the PCM has detected an anomaly within the engine management system. Additionally, other warning lights may also appear, such as those for the ABS or traction control systems, further complicating the diagnosis.

Drivers should be vigilant about these warning signs, as they can lead to more severe mechanical failures if left unaddressed.

Diagnostic Tools and Techniques for Troubleshooting PCM Problems

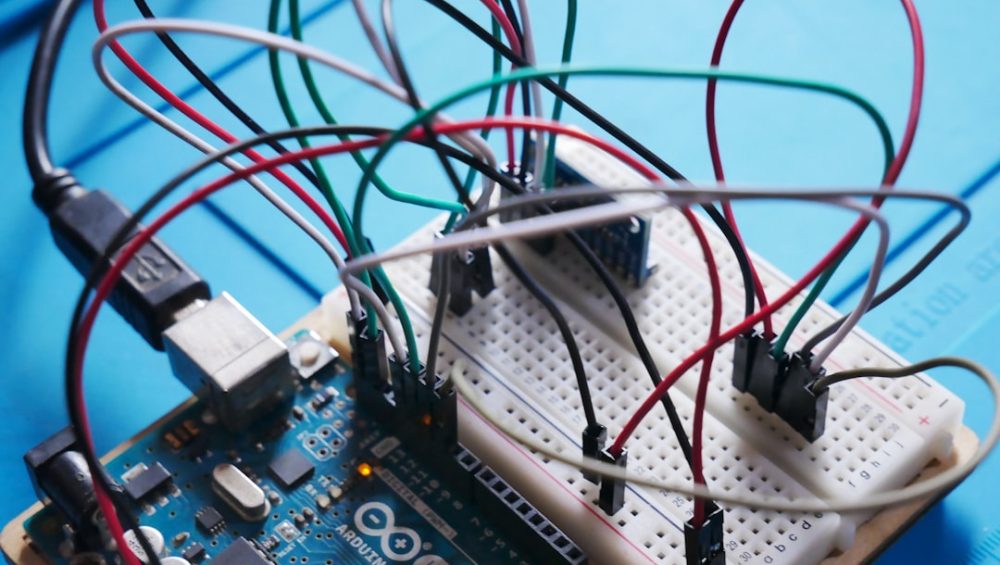
To effectively troubleshoot PCM problems in a 2008 Ford Explorer, a variety of diagnostic tools and techniques can be employed. One of the most essential tools is an OBD-II (On-Board Diagnostics II) scanner. This device connects to the vehicle’s diagnostic port and retrieves trouble codes stored in the PCM’s memory.

These codes provide valuable insights into specific issues affecting the engine and other systems. For instance, a code indicating a malfunctioning oxygen sensor can help pinpoint a problem that may be affecting fuel efficiency and emissions. In addition to OBD-II scanners, multimeters and oscilloscopes can be utilized to test electrical signals and sensor outputs.

A multimeter can measure voltage levels at various points in the wiring harness connected to the PCM, helping to identify any shorts or open circuits that may be causing communication failures. Oscilloscopes can provide a visual representation of signal waveforms, allowing technicians to analyze sensor performance over time. By combining these diagnostic tools with a systematic approach to troubleshooting, mechanics can accurately identify and address PCM-related issues in a 2008 Ford Explorer.

Steps for Checking and Testing the PCM in a 2008 Ford Explorer

Step Description
1 Locate the PCM in the engine compartment
2 Inspect the PCM for any physical damage or corrosion
3 Check the wiring harness and connectors for any signs of damage or loose connections
4 Use a diagnostic scanner to check for any trouble codes stored in the PCM
5 Perform a functional test of the PCM using the diagnostic scanner
6 Check the power and ground connections to the PCM
7 Verify that the PCM is receiving the proper voltage and signals from other sensors

When checking and testing the PCM in a 2008 Ford Explorer, it is essential to follow a structured process to ensure thorough diagnostics. The first step involves visually inspecting the PCM and its associated wiring harness for any signs of damage or corrosion. This includes checking for frayed wires, loose connections, or moisture intrusion that could compromise electrical integrity.

A clean and secure connection is vital for proper communication between the PCM and other vehicle systems. Once visual inspections are complete, technicians should proceed with using an OBD-II scanner to retrieve any stored trouble codes. These codes will guide further testing by indicating which sensors or systems may be malfunctioning.

After identifying potential issues based on trouble codes, it is crucial to test individual sensors and components for proper operation. This may involve using a multimeter to measure voltage outputs or resistance levels at specific connectors. If any sensors are found to be faulty, they should be replaced before retesting the PCM’s functionality.

Addressing Wiring and Connection Issues Related to the PCM

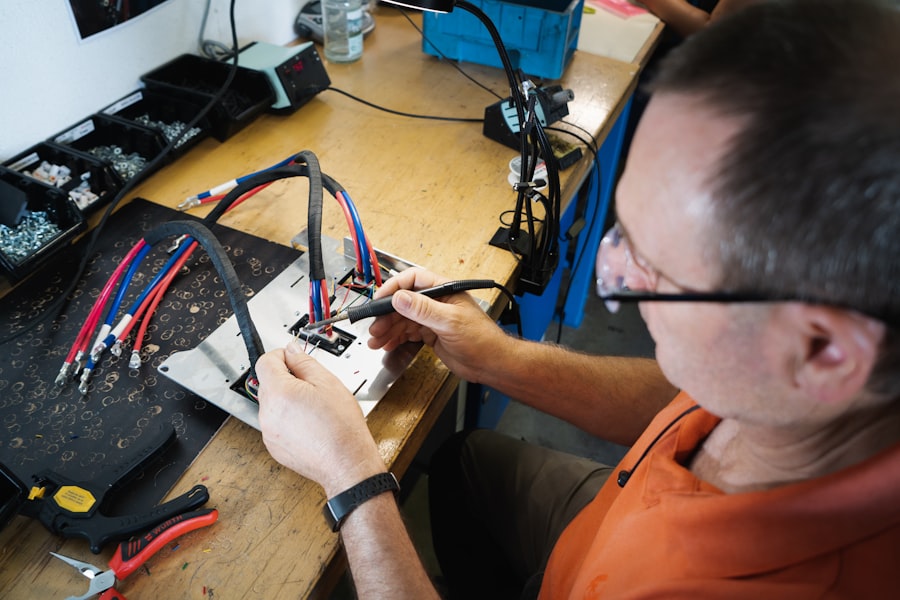
Wiring and connection issues are often at the root of many PCM-related problems in a 2008 Ford Explorer. Over time, exposure to heat, moisture, and road debris can lead to deterioration of wiring insulation and connectors. To address these issues effectively, technicians should begin by performing a comprehensive inspection of all wiring associated with the PCM.

This includes checking for signs of wear or damage along the entire length of wiring harnesses leading to and from the module. If any damaged wires or connectors are identified during inspection, they must be repaired or replaced promptly. In some cases, simply re-securing loose connections can resolve communication issues between the PCM and other components.

Additionally, applying dielectric grease to connectors can help prevent moisture intrusion and corrosion over time. Ensuring that all connections are clean and secure is critical for maintaining reliable communication between the PCM and various sensors throughout the vehicle.

Potential Solutions for Resolving PCM Problems in a 2008 Ford Explorer

Resolving PCM problems in a 2008 Ford Explorer may involve several potential solutions depending on the nature of the issue identified during diagnostics. If trouble codes indicate that specific sensors are malfunctioning, replacing those sensors is often the most straightforward solution. For example, if an oxygen sensor is found to be faulty, replacing it can restore proper fuel management and improve engine performance.

In cases where wiring issues are detected, repairing or replacing damaged wires and connectors can significantly enhance communication between the PCM and other systems. If these solutions do not resolve the problem, reprogramming or updating the PCM’s software may be necessary. Manufacturers periodically release software updates that address known issues or improve performance; thus, ensuring that the PCM is running on the latest software version can sometimes rectify persistent problems.

In more severe cases where physical damage has occurred to the PCM itself—such as from water intrusion or impact—replacement of the module may be required. This process involves removing the old unit and installing a new or refurbished one while ensuring that all connections are secure and properly configured.

Preventative Maintenance for the PCM in a 2008 Ford Explorer

Preventative maintenance plays a crucial role in prolonging the life of the PCM in a 2008 Ford Explorer and minimizing potential issues down the line. Regularly scheduled maintenance checks should include inspections of all electrical connections related to the PCM. Keeping connectors clean and free from corrosion can prevent many common problems associated with poor electrical contact.

Additionally, ensuring that all vehicle sensors are functioning correctly is vital for maintaining optimal communication with the PCM. Regularly replacing worn-out sensors—such as oxygen sensors or mass airflow sensors—can help prevent erroneous readings that may lead to improper engine management decisions by the PCM. Furthermore, routine oil changes and fluid checks contribute to overall engine health, indirectly supporting proper PCM function by ensuring that all systems operate within their designed parameters.

Another important aspect of preventative maintenance involves monitoring for any warning lights on the dashboard. Addressing these alerts promptly can prevent minor issues from escalating into more significant problems that could affect the PCM’s performance.

Seeking Professional Help for Persistent PCM Issues in a 2008 Ford Explorer

While many DIY enthusiasts may feel confident tackling basic diagnostics and repairs related to PCM issues in their 2008 Ford Explorer, there are instances where professional assistance becomes necessary. If troubleshooting efforts do not yield clear results or if multiple components appear to be malfunctioning simultaneously, seeking help from an experienced automotive technician is advisable. Professionals possess specialized knowledge and access to advanced diagnostic equipment that can provide deeper insights into complex electrical issues.

Moreover, if there are indications of internal damage within the PCM itself—such as erratic behavior despite proper sensor readings—consulting with a professional is essential. They can perform more sophisticated tests and determine whether reprogramming or replacement of the module is warranted. In some cases, technicians may also have access to manufacturer-specific tools that allow them to perform tasks beyond standard OBD-II diagnostics.

Ultimately, while many aspects of diagnosing and resolving PCM problems can be managed independently by vehicle owners, recognizing when professional expertise is required can save time and prevent further complications down the road.

If you are experiencing PCM problems with your 2008 Ford Explorer, you may also be interested in reading about how to diagnose a bad ECM. This article from Module Mechanics provides helpful tips and information on identifying issues with your vehicle’s Engine Control Module. By understanding the symptoms and potential causes of ECM problems, you can better address any issues affecting your Ford Explorer’s performance. Check out the article here for more details.

Photo Faulty PCM

Troubleshooting 2006 Ford Explorer PCM Problems

The Powertrain Control Module (PCM) in a 2006 Ford Explorer serves as the brain of the vehicle’s engine and transmission systems. This sophisticated electronic control unit is responsible for monitoring and managing various engine parameters, ensuring optimal performance, fuel efficiency, and emissions control. The PCM processes data from numerous sensors located throughout the vehicle, including the mass airflow sensor, throttle position sensor, and oxygen sensors.

By interpreting this data, the PCM can make real-time adjustments to fuel injection, ignition timing, and other critical functions to maintain the engine’s performance under varying conditions. In addition to its role in engine management, the PCM also communicates with other onboard systems, such as the anti-lock braking system (ABS) and the transmission control module (TCM). This interconnectedness allows for a more integrated approach to vehicle operation, where the PCM can adjust parameters based on inputs from other systems.

For instance, if the ABS detects wheel slip during acceleration, the PCM can modify engine output to enhance traction. Understanding the PCM’s functions and its importance in the overall operation of the 2006 Ford Explorer is crucial for diagnosing and addressing any issues that may arise.

Key Takeaways

  • The PCM in a 2006 Ford Explorer is a crucial component that controls the vehicle’s engine and transmission functions.
  • Common symptoms of PCM problems in a 2006 Ford Explorer include engine stalling, rough idling, and difficulty starting the vehicle.
  • Diagnostic tools such as OBD-II scanners and multimeters can be used to identify PCM issues in a 2006 Ford Explorer.
  • Potential causes of PCM problems in a 2006 Ford Explorer include wiring issues, corrosion, and software malfunctions.
  • Steps for troubleshooting PCM problems in a 2006 Ford Explorer include checking for loose connections, inspecting the wiring harness, and performing a PCM reset.
  • Common solutions for resolving PCM problems in a 2006 Ford Explorer may include repairing or replacing damaged wiring, cleaning corroded connectors, and updating the PCM software.
  • Preventative maintenance tips for avoiding future PCM issues in a 2006 Ford Explorer include keeping the vehicle’s electrical system in good condition and avoiding water damage.
  • Seek professional help for PCM problems in a 2006 Ford Explorer if the diagnostic tools indicate a serious issue, or if the troubleshooting steps do not resolve the problem.

Common Symptoms of PCM Problems in a 2006 Ford Explorer

When the PCM in a 2006 Ford Explorer begins to malfunction, several symptoms may manifest, indicating that something is amiss. One of the most common signs of PCM issues is erratic engine behavior. Drivers may notice that the engine hesitates during acceleration or experiences stalling at idle.

These symptoms can be particularly concerning, as they not only affect drivability but can also pose safety risks if the vehicle stalls unexpectedly while in motion. Another prevalent symptom of PCM problems is the illumination of the check engine light on the dashboard. This warning light can be triggered by a variety of issues, but when it is accompanied by poor engine performance or unusual behavior, it often points to a malfunctioning PCM.

Additionally, drivers may experience poor fuel economy or increased emissions due to improper fuel management by the PCM. These symptoms can lead to higher operating costs and may require immediate attention to prevent further damage to the vehicle.

Diagnostic Tools and Techniques for Identifying PCM Issues

To accurately diagnose PCM problems in a 2006 Ford Explorer, technicians utilize a range of diagnostic tools and techniques. One of the primary tools employed is an OBD-II (On-Board Diagnostics) scanner. This device connects to the vehicle’s diagnostic port and retrieves trouble codes stored in the PCM’s memory.

These codes provide valuable insights into specific issues affecting the engine and other systems. For instance, a code indicating a malfunctioning oxygen sensor may suggest that the PCM is not receiving accurate data for fuel management. In addition to OBD-II scanners, technicians may perform visual inspections of wiring and connectors associated with the PCM.

Corroded or damaged connections can lead to intermittent signals or complete loss of communication between the PCM and various sensors. Furthermore, advanced diagnostic techniques such as oscilloscope testing can be employed to analyze sensor waveforms and ensure they are functioning within expected parameters. By combining these tools and techniques, technicians can pinpoint the root cause of PCM-related issues with greater accuracy.

Potential Causes of PCM Problems in a 2006 Ford Explorer

Potential Causes Related Metrics
Low transmission fluid level Transmission fluid level measurement
Dirty or clogged fuel injectors Fuel injector flow rate, fuel pressure
Faulty oxygen sensor Oxygen sensor voltage, response time
Malfunctioning mass air flow sensor Mass air flow sensor voltage, air flow rate
Ignition system issues Ignition coil voltage, spark plug condition

Several factors can contribute to PCM problems in a 2006 Ford Explorer, ranging from environmental conditions to electrical issues. One common cause is exposure to moisture or extreme temperatures. The PCM is typically located in an area susceptible to water intrusion, which can lead to corrosion of internal components or short circuits.

Additionally, excessive heat generated by the engine compartment can degrade solder joints and electronic components over time, resulting in erratic behavior or complete failure. Electrical issues are another significant contributor to PCM malfunctions. Faulty wiring harnesses or damaged connectors can disrupt communication between the PCM and various sensors, leading to incorrect data interpretation.

Moreover, battery problems such as low voltage or poor connections can affect the PCM’s ability to function correctly. A weak battery may not provide sufficient power for the PCM to operate optimally, resulting in performance issues that mimic actual PCM failure.

Steps for Troubleshooting PCM Problems in a 2006 Ford Explorer

When troubleshooting PCM problems in a 2006 Ford Explorer, a systematic approach is essential for identifying and resolving issues effectively. The first step involves gathering information about the symptoms being experienced by the driver. This includes noting any warning lights illuminated on the dashboard, unusual engine behavior, or changes in fuel economy.

Understanding these symptoms provides a foundation for further investigation. Next, technicians should connect an OBD-II scanner to retrieve any stored trouble codes from the PCM. These codes serve as diagnostic clues that can guide further testing.

Once codes are obtained, technicians should perform visual inspections of wiring and connectors associated with the PCM and relevant sensors. Checking for signs of corrosion, frayed wires, or loose connections can often reveal underlying issues that need addressing. If no obvious problems are found during visual inspection, further testing of individual sensors may be necessary to ensure they are functioning correctly.

Common Solutions for Resolving PCM Problems in a 2006 Ford Explorer

Resolving PCM problems in a 2006 Ford Explorer often involves a combination of repairs and replacements based on identified issues. If visual inspections reveal corroded connectors or damaged wiring harnesses, these components should be repaired or replaced as needed. Ensuring that all electrical connections are clean and secure is crucial for restoring proper communication between the PCM and its associated sensors.

In cases where trouble codes indicate specific sensor failures—such as a malfunctioning mass airflow sensor or throttle position sensor—replacing these components may be necessary to restore proper engine function. After replacing any faulty sensors or wiring, it is essential to clear any stored trouble codes from the PCM using an OBD-II scanner and conduct a test drive to verify that the issues have been resolved. If problems persist despite repairs, further diagnostics may be required to assess whether the PCM itself has failed and needs replacement.

Preventative Maintenance Tips for Avoiding Future PCM Issues

Preventative maintenance plays a vital role in prolonging the life of the PCM in a 2006 Ford Explorer and minimizing potential issues down the line. Regularly scheduled maintenance checks should include inspections of electrical connections and wiring harnesses associated with the PCM. Keeping these components clean and free from corrosion can significantly reduce the risk of electrical failures that could impact PCM performance.

Additionally, ensuring that the vehicle’s battery is in good condition is crucial for maintaining proper voltage levels for all electronic components, including the PCM. Regular battery checks and timely replacements can prevent low voltage situations that might lead to erratic behavior or failure of the control module. Furthermore, protecting the vehicle from extreme weather conditions—such as parking it in a garage during heavy rain or snow—can help mitigate moisture-related issues that could compromise the integrity of the PCM.

When to Seek Professional Help for PCM Problems in a 2006 Ford Explorer

While some minor issues related to the PCM can be addressed by knowledgeable DIY enthusiasts, there are instances when seeking professional help becomes necessary. If a driver experiences persistent symptoms such as stalling, poor acceleration, or multiple warning lights without clear resolution through basic troubleshooting steps, it is advisable to consult with an experienced technician. Professionals possess specialized diagnostic tools and expertise that allow them to conduct thorough assessments beyond what typical consumer-grade equipment can achieve.

Moreover, if there are indications that the PCM itself may be failing—such as erratic behavior despite replacing sensors or wiring—it is crucial to have it evaluated by a professional service center. Replacing a faulty PCM requires precise programming and calibration to ensure compatibility with the vehicle’s systems; this is best handled by trained technicians who understand the intricacies involved in modern automotive electronics. Seeking professional assistance not only ensures accurate diagnosis but also helps prevent further complications that could arise from improper repairs or misdiagnosis.

If you are experiencing issues with your 2006 Ford Explorer’s PCM, you may also be interested in reading about common problems with the Buick Lacrosse on modulemechanics.com. Additionally, if you are having trouble with your Chevy Silverado’s instrument cluster, you can find helpful information on modulemechanics.com. Another related article discusses the speedometer not working in a 1995 Ford F150, which may provide insights into similar issues with your Ford Explorer.

Photo Faulty wiring

Common Alero BCM Problems and Solutions

The Oldsmobile Alero, a compact car produced from 1999 to 2004, has garnered a reputation for its affordability and practicality. However, like many vehicles of its era, it is not without its share of issues. One of the most significant components that can lead to a myriad of problems in the Alero is the Body Control Module (BCM).

The BCM is an essential electronic component that manages various functions within the vehicle, including lighting, power windows, and security systems. When the BCM malfunctions, it can trigger a cascade of electrical issues that affect the overall performance and reliability of the vehicle. Understanding the intricacies of BCM problems in the Alero is crucial for both current owners and potential buyers.

The BCM serves as the nerve center for many electrical systems, and its failure can manifest in various ways. This article delves into the symptoms, common issues, solutions, preventive measures, and costs associated with BCM problems in the Alero. By gaining insight into these aspects, Alero owners can better navigate the challenges posed by BCM failures and maintain their vehicles in optimal condition.

Key Takeaways

  • Alero BCM problems can cause various electrical issues in the vehicle, leading to inconvenience and safety concerns for the driver and passengers.
  • Symptoms of a faulty BCM in an Alero include malfunctioning power windows, door locks, and interior lights, as well as issues with the security system and dashboard warning lights.
  • Common Alero BCM problems include corrosion on the BCM connectors, water damage, and internal component failure due to age and wear.
  • Solutions for Alero BCM issues may include cleaning or replacing the BCM connectors, repairing water damage, or replacing the BCM unit altogether.
  • Tips for preventing Alero BCM problems include regular inspection and maintenance of the electrical system, avoiding water exposure, and addressing any issues promptly to prevent further damage.

Symptoms of a faulty BCM in an Alero

Identifying a faulty BCM in an Alero can be challenging, as the symptoms often mimic those of other electrical or mechanical issues. One of the most common indicators is erratic behavior of the vehicle’s electrical systems. For instance, drivers may notice that their headlights flicker or fail to turn on altogether.

Similarly, power windows may operate inconsistently, either refusing to open or close or doing so at an unpredictable pace. These symptoms can be frustrating and may lead to further complications if not addressed promptly. Another telltale sign of a malfunctioning BCM is the activation of warning lights on the dashboard.

The Alero’s instrument panel may illuminate various warning indicators, such as those for the anti-lock braking system (ABS) or traction control. In some cases, the vehicle may even experience intermittent starting issues, where it fails to start or stalls unexpectedly. These symptoms can create a sense of uncertainty for drivers, as they may not immediately correlate them with a BCM problem.

However, recognizing these signs early on can be pivotal in preventing more severe electrical failures down the line.

Common Alero BCM problems

Several common problems are associated with the BCM in the Oldsmobile Alero. One prevalent issue is water intrusion, which can occur due to leaks in the vehicle’s weather seals or drainage systems. When moisture seeps into the BCM housing, it can cause corrosion and short-circuiting of internal components.

This type of damage often leads to erratic electrical behavior and can render the BCM inoperable. Owners should be vigilant about inspecting their vehicles for signs of water damage, especially after heavy rainfall or flooding. Another frequent problem involves software glitches within the BCM itself.

As vehicles become more reliant on electronic systems, software updates and recalibrations are necessary to ensure optimal performance. In some cases, outdated software can lead to communication errors between the BCM and other electronic modules in the vehicle. This miscommunication can result in various malfunctions, such as failure to recognize key fobs or improper functioning of safety features like airbags.

Regularly updating the vehicle’s software can help mitigate these issues and enhance overall reliability.

Solutions for Alero BCM issues

Issue Solution
BCM not functioning Check for blown fuses and replace if necessary. Reset the BCM by disconnecting the battery for a few minutes.
BCM warning lights on Use a diagnostic tool to check for error codes and troubleshoot accordingly. It may require reprogramming or replacing the BCM.
BCM not communicating with other modules Check for loose or damaged wiring connections. Ensure that the BCM is properly powered and grounded.

Addressing BCM issues in an Alero requires a systematic approach that often begins with proper diagnostics. Many automotive repair shops utilize specialized diagnostic tools to read error codes from the vehicle’s onboard computer system. These codes can provide valuable insights into which specific functions are being affected by the BCM malfunction.

Once the problem has been accurately diagnosed, several solutions may be available depending on the severity of the issue. In cases where water damage has occurred, it may be necessary to replace the BCM entirely. This process involves removing the old module and installing a new one, which can be sourced from dealerships or reputable aftermarket suppliers.

Additionally, ensuring that any leaks are repaired before installing a new BCM is crucial to prevent future damage. For software-related issues, reprogramming or updating the existing BCM may resolve glitches without necessitating a full replacement. Many dealerships offer this service, and it can often be completed relatively quickly.

Tips for preventing Alero BCM problems

Preventive measures can significantly reduce the likelihood of encountering BCM problems in an Oldsmobile Alero. Regular maintenance is key; owners should routinely inspect their vehicles for signs of wear and tear that could lead to water intrusion or electrical failures. This includes checking weather seals around doors and windows for cracks or deterioration and ensuring that drainage channels are clear of debris.

Keeping these areas well-maintained can help protect the BCM from moisture-related damage. Another effective preventive strategy involves monitoring the vehicle’s electrical systems for any irregularities. If drivers notice any unusual behavior—such as flickering lights or inconsistent power window operation—they should address these issues promptly rather than waiting for them to escalate.

Additionally, scheduling regular check-ups with a qualified mechanic can help catch potential problems before they develop into more significant issues. Mechanics can perform diagnostic tests and software updates that keep the BCM functioning optimally.

When to seek professional help for Alero BCM issues

Determining when to seek professional assistance for BCM-related problems in an Alero is essential for maintaining vehicle safety and reliability. If drivers experience persistent symptoms such as dashboard warning lights or erratic electrical behavior, it is advisable to consult a qualified mechanic as soon as possible. Ignoring these signs can lead to more severe complications that may compromise vehicle safety or result in costly repairs down the line.

Additionally, if owners suspect water damage due to leaks or flooding, they should seek professional help immediately. Water intrusion can cause irreversible damage to electronic components if left unaddressed. Mechanics have the expertise and tools necessary to diagnose BCM issues accurately and recommend appropriate solutions.

Early intervention can save time and money while ensuring that the vehicle remains safe and functional.

Cost of repairing Alero BCM problems

The cost associated with repairing BCM problems in an Oldsmobile Alero can vary widely based on several factors, including the nature of the issue and whether a replacement or repair is necessary. For instance, if diagnostics reveal that a simple software update is required, costs may be relatively low—typically ranging from $100 to $200 at most dealerships or repair shops. This price often includes labor and any necessary software fees.

Conversely, if a complete BCM replacement is needed due to severe water damage or internal failure, costs can escalate significantly. The price for a new BCM itself can range from $300 to $600, depending on whether it is sourced from a dealership or an aftermarket supplier. Labor costs for installation may add another $100 to $200 to this total.

Therefore, owners should be prepared for potential expenses when dealing with BCM issues and consider budgeting for regular maintenance to mitigate future costs.

Conclusion and final thoughts on Alero BCM problems

The Body Control Module plays a pivotal role in ensuring that an Oldsmobile Alero operates smoothly and reliably. Understanding the symptoms and common problems associated with a faulty BCM empowers owners to take proactive measures in maintaining their vehicles. By recognizing early signs of trouble and seeking professional help when necessary, drivers can avoid more significant issues down the road.

Preventive strategies such as regular inspections and timely maintenance are essential in safeguarding against BCM-related problems. While repair costs can vary significantly based on the nature of the issue, being informed about potential expenses allows owners to make better financial decisions regarding their vehicle’s upkeep. Ultimately, staying vigilant about BCM health will contribute to a safer driving experience and prolong the life of this dependable compact car.

If you are experiencing issues with your Alero BCM, you may also want to check out this article on Chevy Silverado instrument cluster problems. This article discusses common issues with instrument clusters in Chevy Silverado vehicles and provides helpful tips for troubleshooting and resolving these problems. Understanding potential issues with instrument clusters can help you better diagnose and address any issues you may be facing with your Alero BCM.

Photo Faulty PCM

Common Ford Windstar PCM Issues

The Ford Windstar, a minivan produced by Ford from 1994 to 2003, was designed to cater to families and individuals seeking a spacious and versatile vehicle. Central to the Windstar’s operation is the Powertrain Control Module (PCM), an essential component that manages various engine and transmission functions. The PCM serves as the brain of the vehicle, processing data from numerous sensors and making real-time adjustments to optimize performance, fuel efficiency, and emissions.

Given its critical role, any malfunction or failure of the PCM can lead to a cascade of issues that affect the vehicle’s drivability and reliability. Understanding the intricacies of the Ford Windstar’s PCM is vital for both owners and technicians. The PCM not only controls engine timing and fuel delivery but also communicates with other onboard systems, including the anti-lock braking system (ABS) and the transmission control module.

This interconnectedness means that a problem in the PCM can manifest in various ways, often complicating diagnosis and repair. As such, recognizing symptoms of PCM issues early can save owners from more extensive damage and costly repairs down the line.

Key Takeaways

  • The PCM (Powertrain Control Module) in a Ford Windstar is a crucial component that controls the engine and transmission functions.
  • Symptoms of PCM issues in a Ford Windstar may include engine stalling, rough idling, and difficulty starting the vehicle.
  • Common PCM problems in a Ford Windstar include corrosion, wiring issues, and software malfunctions.
  • Diagnostic steps for Ford Windstar PCM issues may involve using a scan tool to retrieve trouble codes and conducting a thorough inspection of the PCM and related components.
  • Repair and replacement options for Ford Windstar PCM issues may include reprogramming the PCM, repairing wiring issues, or replacing the PCM with a new or remanufactured unit.

Symptoms of PCM Issues in Ford Windstar

When the PCM in a Ford Windstar begins to fail or exhibit problems, several symptoms may arise that can alert the driver to potential issues. One of the most common indicators is erratic engine behavior. This can manifest as stalling, rough idling, or unexpected acceleration.

For instance, a driver may notice that the engine hesitates when accelerating or that it struggles to maintain a steady speed on the highway. Such symptoms can be alarming and often lead to concerns about safety and reliability. Another prevalent symptom of PCM issues is the illumination of warning lights on the dashboard.

The check engine light is particularly significant, as it can indicate a range of problems, including those related to the PCM itself. In some cases, drivers may also experience issues with shifting gears, especially in automatic models. The transmission may shift harshly or fail to engage properly, which can be attributed to incorrect signals being sent from the PCM.

These symptoms not only affect driving comfort but can also lead to more severe mechanical failures if left unaddressed.

Common PCM Problems in Ford Windstar

Several specific problems can arise with the PCM in a Ford Windstar, each with its own set of implications for vehicle performance. One common issue is software corruption or glitches within the PCM’s programming. This can occur due to power surges, battery failures, or even routine wear and tear over time.

When this happens, the PCM may misinterpret sensor data, leading to poor engine performance or erratic behavior. For example, a corrupted PCM might incorrectly adjust fuel delivery, resulting in decreased fuel efficiency or increased emissions. Another frequent problem involves physical damage to the PCM itself.

The module is typically located in an area susceptible to moisture and heat, which can lead to corrosion or short-circuiting over time. If water intrusion occurs due to a faulty seal or damaged wiring harness, it can severely compromise the PCM’s functionality. Symptoms of this type of damage may include intermittent electrical issues, such as flickering lights or malfunctioning accessories, alongside the more direct effects on engine performance.

Diagnostic Steps for Ford Windstar PCM Issues

Diagnostic Steps Description
Check for Error Codes Use an OBD-II scanner to retrieve any error codes stored in the PCM.
Inspect Wiring and Connectors Visually inspect the wiring and connectors for any signs of damage or corrosion.
Check Power and Ground Verify that the PCM is receiving proper power and ground connections.
Perform Voltage Tests Use a multimeter to check for proper voltage at the PCM’s input and output circuits.
Check Sensor Inputs Inspect the sensor inputs to the PCM for any faults or malfunctions.
Inspect PCM for Physical Damage Visually inspect the PCM for any signs of physical damage or water intrusion.
Consult Technical Service Bulletins Check for any relevant technical service bulletins related to PCM issues in Ford Windstar vehicles.

Diagnosing PCM issues in a Ford Windstar requires a systematic approach that combines both electronic diagnostics and traditional mechanical inspection. The first step typically involves using an OBD-II scanner to retrieve any diagnostic trouble codes (DTCs) stored in the vehicle’s computer system. These codes provide valuable insights into what might be malfunctioning within the engine management system or other related components.

For instance, a code indicating a misfire could point towards issues with fuel delivery or ignition timing, potentially linked back to the PCM. Following code retrieval, technicians often perform a visual inspection of the wiring harnesses and connectors associated with the PCM. Loose connections, frayed wires, or signs of corrosion can all contribute to communication failures between the PCM and other systems.

Additionally, checking for any signs of water damage around the PCM housing is crucial, as moisture intrusion can lead to significant operational issues. If no obvious problems are found during these initial checks, further testing may involve monitoring live data from various sensors while the vehicle is running to identify any discrepancies that could indicate PCM malfunction.

Repair and Replacement Options for Ford Windstar PCM

When it comes to addressing PCM issues in a Ford Windstar, owners have several options for repair or replacement. If diagnostics reveal that the PCM is indeed faulty but not beyond repair, reprogramming or reflashing the module may be possible. This process involves updating the software within the PCM to correct any glitches or bugs that may have developed over time.

Many dealerships and specialized automotive shops have access to manufacturer-specific tools that allow them to perform this service effectively. In cases where the PCM is physically damaged or irreparable, replacement becomes necessary. Owners can choose between purchasing a brand-new OEM (Original Equipment Manufacturer) unit or opting for a remanufactured or aftermarket alternative.

While OEM parts ensure compatibility and reliability, remanufactured units can offer significant cost savings without sacrificing quality if sourced from reputable suppliers. Regardless of the choice made, proper installation is critical; incorrect installation can lead to further complications down the line.

Preventative Maintenance for Ford Windstar PCM

Preventative maintenance plays a crucial role in prolonging the life of the PCM in a Ford Windstar and ensuring optimal vehicle performance. Regularly scheduled maintenance checks should include inspections of electrical connections and wiring associated with the PCM. Keeping these components clean and free from corrosion can help prevent many common issues related to electrical failures.

Additionally, ensuring that the vehicle’s battery is in good condition is vital; weak batteries can cause voltage fluctuations that may harm sensitive electronic components like the PCM. Another important aspect of preventative maintenance involves monitoring fluid levels and ensuring that there are no leaks that could lead to moisture intrusion around the PCM area. Regularly checking for signs of wear on seals and gaskets can help mitigate this risk.

Furthermore, keeping up with routine engine maintenance—such as oil changes, air filter replacements, and spark plug inspections—can contribute to overall engine health and reduce stress on the PCM by ensuring it receives accurate data from sensors.

Recurring PCM Issues in Ford Windstar

Despite best efforts at maintenance and repair, some Ford Windstar owners report recurring PCM issues that can be frustrating and costly. One common complaint involves repeated software glitches even after reprogramming attempts. In some cases, these glitches may stem from underlying electrical problems elsewhere in the vehicle that continue to affect the PCM’s performance despite updates or repairs.

Another recurring issue relates to environmental factors affecting the PCM’s longevity. For instance, vehicles frequently exposed to extreme temperatures—whether hot or cold—can experience accelerated wear on electronic components. Additionally, those living in areas with high humidity may find that moisture intrusion becomes a persistent problem despite initial repairs.

These factors highlight the importance of not only addressing immediate PCM issues but also considering broader environmental influences that could impact long-term reliability.

Conclusion and Final Thoughts on Ford Windstar PCM Issues

The Powertrain Control Module is an integral part of the Ford Windstar’s operation, influencing everything from engine performance to transmission behavior. Understanding its role and recognizing symptoms of potential issues are essential for maintaining vehicle reliability. While many problems can be diagnosed and repaired effectively through proper procedures, some owners may face recurring challenges that require ongoing attention.

Ultimately, proactive maintenance and timely repairs are key strategies for minimizing PCM-related issues in the Ford Windstar. By staying vigilant about potential symptoms and adhering to regular maintenance schedules, owners can help ensure their vehicles remain dependable for years to come.

If you are experiencing PCM issues with your Ford Windstar, you may also be interested in reading about common problems with the Buick Lacrosse. According to modulemechanics.com, Buick Lacrosse owners have reported issues with their PCM causing various electrical malfunctions. Understanding the common problems with other vehicles can help you diagnose and address issues with your own vehicle more effectively.

Troubleshooting 2005 Cadillac CTS ECM Problems

When we think about the intricate systems that make our vehicles function smoothly, the Engine Control Module (ECM) stands out as a critical component, especially in a 2005 Cadillac CTS. The ECM acts as the brain of the vehicle, managing various engine functions and ensuring optimal performance. It processes data from numerous sensors throughout the car, including those monitoring air intake, fuel levels, and exhaust emissions.

By interpreting this information, the ECM can adjust fuel injection, ignition timing, and other parameters to enhance efficiency and reduce emissions. In our 2005 Cadillac CTS, the ECM is not just a passive observer; it plays an active role in maintaining the vehicle’s performance. It communicates with other control modules, such as the transmission control module and the anti-lock braking system, to ensure that all systems work in harmony.

Understanding how the ECM operates helps us appreciate its importance in our driving experience. When functioning correctly, it contributes to smooth acceleration, improved fuel economy, and reduced environmental impact. However, when issues arise within the ECM, it can lead to a cascade of problems that affect the overall performance of our vehicle.

Key Takeaways

  • The ECM in a 2005 Cadillac CTS is responsible for managing the engine’s performance and emissions.
  • Common signs of ECM problems in a 2005 Cadillac CTS include engine stalling, poor fuel economy, and difficulty starting the car.
  • Steps to troubleshoot ECM problems in a 2005 Cadillac CTS include checking for blown fuses, loose connections, and damaged wiring.
  • Using diagnostic tools such as OBD-II scanners can help identify ECM issues in a 2005 Cadillac CTS by reading error codes and live data.
  • Addressing wiring and connection problems with the ECM in a 2005 Cadillac CTS involves inspecting and repairing damaged wires and ensuring secure connections.
  • Dealing with software and programming issues in the ECM of a 2005 Cadillac CTS may require reprogramming or updating the ECM with the latest software.
  • Seeking professional help for complex ECM problems in a 2005 Cadillac CTS is recommended, especially for issues related to internal ECM components or advanced programming.
  • Preventative maintenance for the ECM in a 2005 Cadillac CTS includes keeping the engine and electrical system well-maintained, and regularly checking for any signs of ECM trouble.

Common Signs of ECM Problems in a 2005 Cadillac CTS

As we drive our 2005 Cadillac CTS, we may notice certain signs that indicate potential ECM problems. One of the most common symptoms is the illumination of the check engine light on the dashboard. This warning light can signify various issues, but when it appears alongside other symptoms, it often points to an ECM malfunction.

We might also experience erratic engine behavior, such as stalling or rough idling, which can be frustrating and concerning. Another sign that we should be aware of is decreased fuel efficiency. If we find ourselves making more frequent trips to the gas station without any changes in our driving habits, it could be a red flag that the ECM is not optimizing fuel delivery.

Additionally, we may notice unusual acceleration patterns or difficulty shifting gears in automatic models. These symptoms can indicate that the ECM is struggling to communicate effectively with other components of the vehicle, leading to a less-than-ideal driving experience.

Steps to Troubleshoot ECM Problems in a 2005 Cadillac CTS

When we suspect that our 2005 Cadillac CTS may have ECM issues, taking a systematic approach to troubleshooting can help us identify the root cause. The first step is to check for any diagnostic trouble codes (DTCs) using an OBD-II scanner. This tool connects to the vehicle’s onboard diagnostic system and retrieves codes that can provide insight into what might be malfunctioning.

By noting these codes, we can narrow down potential issues and determine whether they are related to the ECM or other components. Next, we should inspect the vehicle for any visible signs of damage or wear. This includes checking wiring harnesses and connectors associated with the ECM for fraying or corrosion.

Sometimes, a simple loose connection can lead to significant problems. If we find any damaged wiring or connectors, addressing these issues may resolve our ECM concerns without further intervention. However, if everything appears intact and we still experience symptoms, it may be time to delve deeper into the ECM itself.

Using Diagnostic Tools to Identify ECM Issues in a 2005 Cadillac CTS

Diagnostic Tool ECM Issue Identified Resolution
OBD-II Scanner Faulty oxygen sensor Replaced sensor
ECU Flashing Tool Software malfunction Reprogrammed ECM
Diagnostic Trouble Code Reader Throttle position sensor error Adjusted sensor

Utilizing diagnostic tools is essential for accurately identifying ECM issues in our 2005 Cadillac CTS. An OBD-II scanner is our first line of defense; it allows us to read trouble codes and monitor real-time data from various sensors. By analyzing this data, we can gain insights into how well the ECM is performing its functions.

For instance, if we notice that certain sensor readings are out of range or inconsistent with expected values, it could indicate a problem with either the sensor itself or the ECM’s ability to interpret its data. In addition to basic OBD-II scanners, more advanced diagnostic tools are available that can perform deeper analyses of the ECM’s performance. These tools can provide live data streams and allow us to run specific tests on various components controlled by the ECM.

By using these advanced diagnostics, we can pinpoint issues more accurately and determine whether repairs or replacements are necessary. This proactive approach not only saves us time but also helps prevent further damage to our vehicle.

Addressing Wiring and Connection Problems with the ECM in a 2005 Cadillac CTS

Wiring and connection problems are often overlooked when diagnosing ECM issues in our 2005 Cadillac CTS. However, these problems can significantly impact how well the ECM communicates with other components of the vehicle. We should start by visually inspecting all wiring harnesses connected to the ECM for any signs of wear or damage.

Frayed wires or corroded connectors can disrupt signals and lead to erratic engine behavior. If we identify any damaged wiring or connections, addressing these issues promptly is crucial. In some cases, we may be able to repair frayed wires by splicing them together or using electrical tape for temporary fixes.

However, for more severe damage or corrosion, replacing the affected wiring harnesses or connectors may be necessary. Ensuring that all connections are secure and free from corrosion will help restore proper communication between the ECM and other systems in our vehicle.

Dealing with Software and Programming Issues in the ECM of a 2005 Cadillac CTS

Software and programming issues can also contribute to ECM problems in our 2005 Cadillac CTS. Over time, software glitches or outdated programming can lead to performance issues that affect how well the ECM operates. If we suspect that software may be at fault, one of our first steps should be to check for any available updates from the manufacturer.

Many automakers release software updates to address known issues and improve overall performance. In some cases, reprogramming or resetting the ECM may resolve persistent problems. This process typically involves using specialized diagnostic tools to erase existing data and upload new software versions.

While this may sound complex, many automotive technicians are well-versed in this procedure and can perform it efficiently. By ensuring that our ECM software is up-to-date and functioning correctly, we can help maintain optimal performance in our 2005 Cadillac CTS.

Seeking Professional Help for Complex ECM Problems in a 2005 Cadillac CTS

While we may feel confident troubleshooting basic ECM issues ourselves, some problems require professional expertise. If we have exhausted all troubleshooting steps without success or if we encounter complex symptoms that are difficult to diagnose, seeking help from a qualified technician is advisable. Professional mechanics have access to advanced diagnostic tools and extensive experience working with ECMs in various vehicles.

When we take our 2005 Cadillac CTS to a professional, they will conduct a thorough inspection and utilize their expertise to identify underlying issues that may not be immediately apparent. They can also perform more advanced tests that require specialized equipment beyond what we might have at home. By entrusting our vehicle to a professional, we can ensure that any complex ECM problems are addressed effectively and efficiently.

Preventative Maintenance for the ECM in a 2005 Cadillac CTS

Preventative maintenance is key to ensuring that our 2005 Cadillac CTS’s ECM remains in good working condition over time. Regularly scheduled maintenance checks can help us catch potential issues before they escalate into more significant problems. This includes routine inspections of wiring harnesses and connectors for signs of wear or corrosion as well as keeping an eye on engine performance metrics.

Additionally, staying informed about software updates from the manufacturer is essential for maintaining optimal performance. By keeping our vehicle’s software current, we can benefit from improvements made by engineers who understand how best to optimize engine performance and efficiency. Taking these proactive steps not only enhances our driving experience but also extends the lifespan of our vehicle’s critical components, including the ECM.

In conclusion, understanding the role of the ECM in our 2005 Cadillac CTS is vital for maintaining its performance and reliability. By recognizing common signs of problems, utilizing diagnostic tools effectively, addressing wiring issues promptly, and seeking professional help when necessary, we can ensure that our vehicle remains in top condition for years to come. Through preventative maintenance practices, we can safeguard against future issues and enjoy a smoother driving experience overall.

If you are experiencing ECM problems with your 2005 Cadillac CTS, you may also be interested in reading about common issues with the Buick Lacrosse on modulemechanics.com. This article discusses potential problems with the Buick Lacrosse’s electronic control module and offers solutions for resolving them. Understanding the issues faced by other vehicles can provide valuable insight into troubleshooting and fixing your Cadillac CTS ECM problems.

Photo Car dashboard

Resetting the Mitsubishi Eclipse ECU: A Step-by-Step Guide

The Engine Control Unit (ECU) in a Mitsubishi Eclipse serves as the brain of the vehicle’s engine management system. This sophisticated electronic device is responsible for monitoring and controlling various engine functions, ensuring optimal performance and efficiency. It processes data from numerous sensors throughout the vehicle, such as those measuring air intake, temperature, and exhaust emissions.

By analyzing this information, the ECU can make real-time adjustments to fuel injection, ignition timing, and other critical parameters, allowing the engine to operate smoothly under varying conditions. In essence, the ECU plays a pivotal role in the overall functionality of the Mitsubishi Eclipse. It not only enhances performance but also contributes to fuel efficiency and emissions control.

As technology has advanced, the complexity of ECUs has increased, leading to more refined control over engine operations. This evolution has made modern vehicles, including the Eclipse, more reliable and capable of meeting stringent environmental regulations. Understanding the role of the ECU is crucial for any Eclipse owner who wishes to maintain their vehicle’s performance and longevity.

Key Takeaways

  • The ECU in a Mitsubishi Eclipse is the Engine Control Unit, which is responsible for managing the engine’s performance and efficiency.
  • Reasons for resetting the ECU include improving fuel efficiency, resolving engine performance issues, and clearing error codes.
  • Before resetting the ECU, it is important to gather necessary tools such as a wrench, socket set, and battery terminal puller, and to ensure the vehicle is parked in a safe and well-ventilated area.
  • Steps to reset the ECU involve disconnecting the battery, waiting for a few minutes, and then reconnecting the battery to allow the ECU to reset.
  • Common issues after resetting the ECU may include rough idling, stalling, or a temporary decrease in fuel efficiency, which should resolve after the ECU relearns the engine’s parameters.
  • Tips for maintaining the ECU include keeping the vehicle’s electrical system in good condition, using high-quality fuel and performing regular maintenance.
  • Seek professional help if the vehicle continues to experience issues after resetting the ECU, or if there are persistent error codes or warning lights.
  • In conclusion, resetting the ECU can be a useful troubleshooting step, but it’s important to follow proper procedures and seek professional help if needed.

Reasons for resetting the ECU

There are several reasons why we might consider resetting the ECU in our Mitsubishi Eclipse. One of the most common motivations is to clear error codes that may have been triggered by temporary issues. When a fault occurs, the ECU logs a diagnostic trouble code (DTC) that can illuminate the check engine light on our dashboard.

Resetting the ECU can help us clear these codes, especially if we have already addressed the underlying problem. This process can provide us with a fresh start, allowing us to monitor our vehicle’s performance without the distraction of lingering error messages. Another reason for resetting the ECU is to restore factory settings after modifications or repairs.

If we have made changes to our vehicle’s engine components or installed aftermarket parts, the ECU may need to recalibrate itself to accommodate these updates. Resetting it can help ensure that it recognizes new parameters and optimizes performance accordingly. Additionally, if we have experienced significant changes in driving conditions or have recently replaced major components like the battery or alternator, a reset can help the ECU relearn optimal settings for our specific driving habits and environmental factors.

Preparing to reset the ECU

Before we embark on the process of resetting the ECU in our Mitsubishi Eclipse, it is essential to prepare adequately. First and foremost, we should ensure that we have a clear understanding of why we are resetting it and what we hope to achieve from this action. Having a specific goal in mind will help us gauge whether the reset was successful and if any further steps are necessary afterward.

Next, we should gather all necessary tools and materials. Typically, resetting the ECU can be done with minimal equipment; however, having a reliable OBD-II scanner can be beneficial for diagnosing any existing issues before we proceed with the reset. Additionally, we should ensure that our vehicle is parked in a safe and well-ventilated area, as we may need to disconnect the battery during the process.

Taking these preparatory steps will help us execute the reset smoothly and efficiently.

Steps to reset the ECU

Step Description
Step 1 Locate the ECU
Step 2 Disconnect the battery
Step 3 Wait for 30 minutes
Step 4 Reconnect the battery
Step 5 Start the engine and let it idle for 5 minutes

Resetting the ECU in our Mitsubishi Eclipse can be accomplished through several methods, but one of the most straightforward approaches involves disconnecting the battery. To begin, we should turn off our vehicle and remove the keys from the ignition. Next, we will locate the battery under the hood and use a wrench to carefully disconnect the negative terminal first.

This step is crucial as it helps prevent any electrical shorts or damage during the process. Once we have disconnected the negative terminal, we should wait for approximately 15 minutes. This waiting period allows any residual power in the system to dissipate fully, ensuring that the ECU resets completely.

After this time has elapsed, we can reconnect the negative terminal securely. It’s advisable to double-check that all connections are tight before starting our vehicle again. Upon turning on the ignition, we should observe whether any warning lights remain illuminated on the dashboard.

If everything has gone according to plan, we should see that any previous error codes have been cleared.

Common issues after resetting the ECU

After resetting the ECU in our Mitsubishi Eclipse, we may encounter some common issues that could arise as a result of this action. One potential problem is that our vehicle may initially run rough or experience stalling as the ECU recalibrates itself to our driving habits and environmental conditions. This behavior is typically temporary and should improve as the ECU gathers data from various sensors during normal operation.

Another issue we might face is that certain settings or preferences may revert to factory defaults after a reset. For instance, if we had customized settings for features like idle speed or fuel mixture ratios, these adjustments may be lost. Consequently, we may need to reconfigure these settings manually or allow some time for the ECU to relearn our preferences based on our driving style.

Being aware of these potential issues can help us manage expectations and ensure that we monitor our vehicle closely after performing an ECU reset.

Tips for maintaining the ECU

To ensure that our Mitsubishi Eclipse’s ECU remains in optimal condition, there are several maintenance tips we can follow. First and foremost, regular diagnostics using an OBD-II scanner can help us identify any potential issues before they escalate into more significant problems. By routinely checking for error codes and addressing them promptly, we can maintain our vehicle’s performance and prevent unnecessary strain on the ECU.

Additionally, keeping our vehicle’s electrical system in good shape is crucial for ECU health. We should regularly inspect battery connections and wiring for signs of corrosion or wear. A weak battery or poor electrical connections can lead to erratic behavior from the ECU and may even cause it to malfunction over time.

Furthermore, ensuring that our vehicle’s software is up-to-date can also contribute to better performance and reliability. Manufacturers often release updates that enhance functionality or address known issues, so staying informed about these updates is beneficial.

When to seek professional help

While many of us may feel comfortable resetting the ECU ourselves, there are instances when seeking professional assistance is advisable. If we encounter persistent error codes after a reset or if warning lights remain illuminated on our dashboard despite our efforts, it may indicate a more serious underlying issue that requires expert diagnosis. In such cases, consulting with a qualified mechanic or technician can provide us with valuable insights into what might be wrong with our vehicle.

Additionally, if we are unsure about performing an ECU reset or lack confidence in our ability to do so safely, it’s best not to take unnecessary risks. Professionals have access to specialized tools and equipment that can facilitate accurate diagnostics and repairs. They also possess extensive knowledge about specific models like the Mitsubishi Eclipse, which can be invaluable when addressing complex issues related to engine management systems.

In conclusion, understanding the role of the ECU in our Mitsubishi Eclipse is essential for maintaining optimal performance and efficiency. Resetting this critical component can be beneficial for clearing error codes and recalibrating settings after modifications or repairs. However, it’s important for us to prepare adequately before undertaking this task and to be aware of potential issues that may arise afterward.

By following proper maintenance practices and knowing when to seek professional help, we can ensure that our vehicle remains in top condition for years to come. Ultimately, taking proactive steps in managing our Mitsubishi Eclipse’s ECU will not only enhance its performance but also contribute to a more enjoyable driving experience overall.

If you are looking to reset the ECU on your Mitsubishi Eclipse, you may also be interested in learning how to diagnose a bad ECM. This article from Module Mechanics provides valuable information on identifying signs of a faulty ECM and offers guidance on troubleshooting the issue. Check it out here.

Top Buick LaCrosse Problems Revealed

Is your Buick LaCrosse acting up? You’re not alone. Many drivers face common issues with this popular car, that can affect performance and safety.

The Buick LaCrosse has been a staple in the automotive market, offering comfort and a smooth ride. However, like any vehicle, it’s prone to certain failures that can disrupt your driving experience.

In this article, we will reveal the top issues associated with the Buick LaCrosse and how Module Mechanics can help. From engine control computer issues to essential maintenance tips, we’ve got you covered for a smoother journey ahead.

The Buick LaCrosse is a mid-size sedan known for its comfortable ride and luxurious interior. It’s popular for its sleek design and smooth handling, making it a reliable choice for those seeking a mix of performance and style. However, like any vehicle, it has its share of common issues.

Common Issues Across Model Generations

The Buick LaCrosse has been a staple in the mid-size sedan market, but it’s not without common problems. Across different model generations, issues like engine stalling and power steering hose leaks are frequently reported. These persistent problems hinder the vehicle’s performance and can lead to costly repairs if not addressed promptly.

1. Check Engine Light Activation

One of the most prevalent issues is the check engine light activation. This warning light often signals engine stalls, misfires, or sensor problems. Owners of models equipped with the 3.8-liter V6 engine experience these issues commonly, emphasizing the need for quick diagnosis to avoid more severe engine troubles.

2. Intermittent Headlight Failures

Another recurring problem for Buick LaCrosse owners is intermittent headlight failures. This issue can create a hazardous driving situation, especially at night or during adverse weather conditions. Regular checks and timely replacements can help mitigate this dangerous issue, enhancing safety and reliability.

3. Door Lock Actuator Malfunctions

Door lock actuator malfunctions are also prevalent, affecting the vehicle’s security and convenience. This problem can lead to difficulties in locking or unlocking doors, potentially posing security concerns. Addressing this issue early can prevent further complications and improve the overall user experience.

Serious Mechanical Problems

The Buick LaCrosse, has also been associated with serious mechanical issues over the years. These problems have raised concerns about its reliability and safety. Owners often report various issues that can compromise the car’s performance and their driving experience.

4. Cooling System Leaks

Cooling system leaks are a common issue in Buick LaCrosse models. They can lead to engines running hot, which might result in costly engine repairs if not addressed promptly. A slow leak often develops in the power steering hoses or hydraulic fluid lines, causing the engine to overheat.

5. Timing Chain Failures

Timing chain failures in Buick LaCrosse models can be a serious safety hazard. This issue typically surfaces in vehicles with high mileage and can cause engine stalls or misfires. Repair costs for fixing timing chains can be quite high, making periodic inspections essential.

6. Reduced Engine Power Warning Light

A reduced engine power warning light often indicates a throttle body sensor problem or ECU issue. This leads to loss of power steering and decreased engine performance.

Additional Notable Issues

The Buick LaCrosse, while popular as a mid-size sedan, is not without its share of problems. Owners frequently report various issues ranging from minor inconveniences to significant safety hazards. Being aware of these can help in maintaining the car efficiently and avoid costly repairs.

7. Throttle Body Assembly Failure

Many Buick LaCrosse owners experience throttle body assembly failures. This can trigger warning lights and lead to engine power reduction or stalls. Unfortunately, repairing or replacing the throttle body can be costly.

8. Wheel Speed Sensor Problems

Faulty wheel speed sensors are another challenge. This issue can cause erratic ABS operation and traction control system warnings. These sensors are critical for the vehicle’s stability and safety. Regular inspections and timely replacements can mitigate this problem, ensuring safe driving conditions.

9. Transmission Issues

LaCrosse owners also report transmission problems such as slipping, delayed shifts, and transmission failure. These issues can escalate if not addressed promptly. Proper maintenance and periodic transmission fluid checks are critical.

Comparing First and Second-Generation Problems

When evaluating the Buick LaCrosse, it’s essential to consider the common problems of both its first and second-generation models. The first-generation LaCrosse, produced from 2005 to 2009, is frequently noted for its engine issues, including the persistent engine light and engine stalls. Other challenges include throttle body sensor malfunctions and power steering hose leaks. Brake failure remains a concern, posing a safety hazard.

In contrast, the second-generation LaCrosse, released from 2010 to 2016, shows improvements but still suffers from significant issues. Engine misfire and engine auto problems are reported often, particularly affecting models with the 3.8-liter V6 engine. Loss of power steering and slow leaks of hydraulic fluid contribute to its common issues, impacting the vehicle’s reliability ratings.

If your Buick LaCrosse experiences engine control computer problems, it might be time to consider professional services. Module Mechanics specializes in replacing and reprogramming Buick LaCrosse ECUs, ECMs, PCMs, and BCMs. We offer not only part replacement but also VIN programming and the latest OEM software updates, ensuring your vehicle runs smoothly and safely.

Tips for Buick LaCrosse Owners

Owning a Buick LaCrosse comes with several common issues that require vigilance. Always pay attention to your dashboard warning lights. Frequent “check engine light” alerts could indicate problems with the ECU or other engine components. If these issues persist, consider the services of Module Mechanics, a specialist in replacing and reprogramming ECUs, ECMs, PCMs, and BCMs with VIN programming and updated OEM software.

Another frequent problem is a loss of power steering due to power steering hose leaks. This can be a dangerous issue leading to safety hazards. Regularly check the hydraulic fluid levels and inspect hoses for potential leaks. Timely maintenance can prevent unexpected steering stops and improve reliability ratings.

Seat belts and brake failure are additional common safety concerns with the Buick LaCrosse. Make routine checks part of your car care advice to ensure they function correctly. If your brakes feel less responsive, don’t delay a visit to the mechanic. Regular maintenance not only enhances safety but also protects your investment against costly engine repairs.

Lastly, watch out for engine stalling and misfires, especially with the 3.8-liter V6 engine. Such issues can be signs of a failing engine auto or throttle body sensor. Keeping up with recommended maintenance schedules can significantly extend your vehicle’s longevity.

Conclusion: Making Informed Decisions

When it comes to addressing Buick LaCrosse problems, making informed decisions is crucial. Understanding common issues like engine stalling, power steering hose leaks, and brake failures can help you prioritize necessary repairs. Consider all warning lights seriously, as they indicate potential reliability hazards that could compromise safety.

For those experiencing engine control computer troubles, Module Mechanics offers vital services like ECU, ECM, PCM, and BCM replacement. This includes VIN programming and OEM software updates, ensuring your LaCrosse remains in top condition. It’s critical to address these Buick LaCrosse problems early to avoid costly engine repairs and ensure the vehicle’s longevity. Understanding common issues and proper care advice can significantly boost your LaCrosse’s reliability ratings.

DIY: How to Easily Reset the ECU on Your Honda Civic

Have you ever experienced odd performance issues with your Honda Civic? Understanding the heart of your vehicle, the Engine Control Unit (ECU), is essential for any car owner wanting to maintain optimal performance.

The ECU is like your car’s brain, managing crucial functions and helping it run efficiently. Sometimes, it may need a reset to resolve issues, just like your computer after a glitch. Knowing when and how to perform this reset can save you both time and money.

In this article, we will guide you through the simple steps to reset the ECU on your Honda Civic, ensuring your vehicle runs smoothly again. If you need more assistance with your vehicle’s maintenance, Module Mechanics offers extensive services to keep your car in top shape.

Understand the Importance of ECU Reset

Resetting your Honda Civic’s ECU (Engine Control Unit) can be crucial for enhancing vehicle performance and diagnosing issues. The ECU is responsible for managing engine functions, tuning, and fuel management. Over time, it collects data that can affect vehicle operations negatively.

An ECU reset can clear stored trouble codes and performance memory, essentially giving your car a fresh start. This can make a noticeable difference in idle speed and fuel trims, often restoring smooth operation to your engine. Post-reset, the vehicle may require some driving (about 30-40 miles) to recalibrate settings and optimize performance fully.

However, if ongoing issues persist, it may indicate deeper mechanical problems that a simple reset won’t fix. Consider consulting professionals who specialize in ECU tuning and other technical interventions.

For expert assistance, Module Mechanics offers specialized services designed to fix and optimize your vehicle’s performance. Their expertise can ensure your Honda Civic runs smoothly, even beyond what an ECU reset can achieve. Visit Module Mechanics for comprehensive solutions to your automotive challenges.

Identify Signs Your ECU Needs a Reset

The Engine Control Unit (ECU) is vital for your Honda Civic’s optimal performance, managing everything from fuel trim to engine idle. Occasionally, it may require a reset to address various issues. Here are signs that your ECU might need a reset:

  1. Unexpected Engine Lights: Persistent or flashing engine lights can indicate the ECU is experiencing errors or misconfigurations.
  2. Irregular Engine Behavior: Issues such as erratic idle speed or sudden stalls may suggest an ECU reset is needed for smooth operation.
  3. Poor Fuel Efficiency: If you’re suddenly noticing reduced miles per tank of gas without changes in driving habits, a reset could help restore fuel management balance.
  4. Power Loss: Experiencing a drop in engine power might indicate ECU performance memory issues needing reevaluation.

If these symptoms persist, it could help to perform a simple reset through methods like removing the ECU fuse or disconnecting the negative battery terminal. For persistent problems, professional assessment is recommended.

For expert advice or services related to ECU tuning and troubleshooting, consider reaching out to Module Mechanics. Their skilled technicians provide solutions tailored to your vehicle’s specific needs, ensuring optimal performance and reliability.

Benefits of Resetting Your ECU

Resetting your Honda Civic’s ECU can offer several advantages, enhancing your vehicle’s overall performance. One primary benefit is the potential improvement in fuel efficiency. By clearing the existing fuel trim data, the ECU can relearn optimal fuel delivery settings based on current driving conditions, which may lead to a reduction in fuel consumption.

Another benefit is smoother engine operation. Resetting the ECU can help eliminate stored trouble codes and warning lights that do not reflect current mechanical issues, thereby restoring default settings. This process can mitigate away minor engine idle and idle speed inconsistencies, providing a more stable and consistent driving experience.

In addition, an ECU reset may accentuate vehicle responsiveness by erasing the performance memory. This allows the system to recalibrate and react appropriately to new conditions or alterations such as a recently installed air filter, fuel filter, or a bottle of fuel injector cleaner.

For car enthusiasts exploring ECU tuning & fuel management adjustments, resetting can be crucial after modifications to ensure proper integration and to harness the modifications’ benefits fully. For more assistance with electronic control units and vehicle optimization, consider reaching out to the experts at Module Mechanics, where skilled professionals can offer guidance tailored to your vehicle’s needs.

Potential Risks Involved in ECU Reset

Resetting the ECU on your Honda Civic might seem like an easy fix for several issues, but it’s important to be aware of the potential risks involved. Firstly, an ECU reset will erase learned data, including the fuel trims and performance memory. This can lead to rough engine idle or erratic performance until the ECU relearns necessary parameters, which might take a couple of hours or even 30-40 miles of driving.

Another risk is the inadvertent clearance of stored trouble codes and warning lights. These codes are crucial for diagnosing underlying mechanical problems and may require manual re-entry or diagnostic tools to recover. Additionally, frequent ECU resets might mask more serious issues that require professional intervention.

Finally, disconnecting battery cables to reset the ECU can also disrupt your radio presets and clock settings. It’s essential to ensure smooth operation post-reset by driving a couple of laps around to allow the ECU to adapt.

For expert guidance and professional ECU Tuning & Fuel Management, consider consulting the specialists at Module Mechanics. Their expertise can help optimize your vehicle’s performance without the risks of a reset.

Gather Necessary Tools and Materials

Before resetting the Honda Civic ECU, you’ll need to gather a few essential tools and materials to ensure the process runs smoothly. First, ensure you have a wrench or socket set handy; this will be crucial for disconnecting the negative battery terminal. A fuse puller will also be useful when accessing the ECU fuse in the fuse box.

In addition to these tools, it’s wise to have some emergency items on hand, such as a bottle of fuel injector cleaner and spare fuses, in case you encounter any related issues during the process. You might also want to keep a basic set of troubleshooting tools for minor Mechanical Problems & Technical Chat.

Having these tools and materials ready will make resetting your Honda Civic’s ECU efficient and hassle-free. For any issues that arise or for more advanced assistance, consider consulting professional services like those at Module Mechanics for expert guidance and support.

Locate Your Honda Civic’s ECU Fuse

To reset your Honda Civic’s ECU, one of the first steps is to locate the ECU fuse. The ECU fuse is typically found in the fuse box, which is positioned under the hood near the battery or in the passenger compartment. Accessing the correct fuse requires a little knowledge about the fuse locations.

To find the ECU fuse, consult your vehicle’s owner’s manual. This guide provides a diagram of the fuse box, detailing each fuse’s function. Use a fuse puller or a pair of pliers to remove the ECU fuse carefully. After removing it, wait a couple of minutes to ensure that all stored data is cleared from the memory. Then, reinsert the fuse to complete the reset process.

If you’re experiencing engine lights or other performance issues and need more assistance, Module Mechanics can help. They offer expert advice and services related to ECU tuning, fuel management, and mechanical problem diagnostics. Visit their website to learn more and ensure your vehicle runs smoothly.

Remove the ECU Fuse Safely

To safely remove the ECU fuse from your Honda Civic, first locate the fuse box, typically positioned under the dashboard on the driver’s side or in the engine bay. Refer to your vehicle’s manual for the exact location of the ECU fuse. Before proceeding, ensure the car is parked on a flat surface, turn off the ignition, and remove the car key to prevent any electrical shocks or complications.

Use a fuse puller tool, often provided within the fuse box, to gently extract the ECU fuse. Carefully grip the fuse and pull it straight out without twisting, as this can damage both the fuse and the socket. Remember to inspect the fuse for any damage or burn marks that might indicate other underlying issues.

Once removed, wait a few minutes before reinstalling to allow the ECU to reset. After reinserting the fuse, test your vehicle by starting the engine and ensuring all warning lights have cleared. If issues persist, consult a professional mechanic. For expert advice and service to ensure smooth operation of your vehicle’s ECU system, consider reaching out to the specialists at Module Mechanics for all your ECU needs.

Wait for the Required Duration

When resetting the ECU of a Honda Civic, patience is key. After removing the ECU fuse or disconnecting the negative battery terminal, you need to wait for the required duration to ensure a full reset. Typically, this takes about 15 to 30 minutes. During this time, your car’s system will lose retained data such as performance memory and fuel trim information, returning the ECU to its original factory settings.

It’s crucial to not rush this process. The waiting period allows the ECU to clear any temporary trouble codes and standby mode errors it might have been holding. Once the ECU is reset, expect your Civic to require a couple of drives or laps around, typically about 30-40 miles, for the system to relearn and adjust to smooth operation. This step helps your vehicle recalibrate, ensuring optimal performance and the clearing of any lingering warning lights or engine lights.

For issues beyond a simple reset, Module Mechanics is here to help with ECU tuning and fuel management and other mechanical problems. Explore their services to ensure your Honda Civic operates at its best.

Reinsert the ECU Fuse

Reinserting the ECU fuse is a straightforward process crucial for resetting the ECU, which helps to clear trouble codes and restore performance memory. First, locate your Honda Civic’s fuse box, typically found under the hood or beneath the dashboard. Using a fuse puller or a pair of pliers, carefully remove the ECU fuse. Allow a couple of minutes, giving the system time to reset.

Once this initial time has passed, reinsert the ECU fuse securely back into its slot. This action can help adjust fuel trims and stabilize idle speed, promoting smooth engine operation. Reinserting the fuse also plays a role in resolving minor issues with warning lights and enabling the ECU to relearn optimal settings from inputs such as the air filter and fuel injector performance.

If you’re not comfortable with this procedure or need further assistance, Module Mechanics offers professional guidance and services to ensure your Honda Civic runs smoothly and efficiently. Visit our website to explore more ways to enhance your vehicle’s performance and resolve mechanical problems.

Cycle the Ignition On and Off

Cycling the ignition on and off is a simple yet effective method for resetting some vehicle systems, including the ECU. To do this, turn your car’s ignition key to the “On” position without starting the engine, then switch it back to the “Off” position. Repeat this process three to four times. This sequence can help reset minor electronic glitches and recalibrate settings stored in the ECU.

It’s important to let your vehicle sit for a few seconds between each cycle to allow the electronics to stabilize. This method can aid in resetting engine lights or warning codes that might have triggered due to temporary issues. However, for more persistent problems, professional assistance is advised.

If you’re looking for expert advice or full diagnostics, consider Module Mechanics for all your automotive module needs. Our team specializes in ECU Tuning & Fuel Management, helping ensure your vehicle runs smoothly and efficiently. Visit https://modulemechanics.com/ for more information and services.

Start Your Vehicle and Monitor Performance

Starting your vehicle and monitoring its performance is crucial for maintaining optimal engine health. Begin by turning the ignition key or pressing the start button, while ensuring that your dashboard warning lights do not remain illuminated longer than necessary. Persistent lights could indicate underlying mechanical issues that need attention.

Once the vehicle is started, let it idle for a couple of minutes to achieve optimal engine temperature. This is the initial time during which you should listen for any unusual noises and ensure the RPMs stabilize at the correct idle speed. This process allows the engine to run smoothly and helps in noticing performance deviations early.

Observe the vehicle’s behavior as you drive for about 30-40 miles. Pay attention to fuel efficiency, acceleration, and any hesitation in response, as these could suggest issues with the fuel injectors, air filter, or fuel trim. Conducting regular performance monitoring aids in identifying problem areas before they become significant repair needs.

For expert assistance in maintaining your vehicle’s performance, the professionals at Module Mechanics offer top-tier ECU tuning and fuel management services. Their expertise ensures that your car operates at its best efficiency and minimizes unexpected mechanical problems.

Conduct a Test Drive to Ensure Reset Effectiveness

To ensure the effectiveness of an ECU reset in a Honda Civic, it is crucial to conduct a test drive. Begin by starting the engine, allowing it to reach normal operating temperature. This ensures that the ECU has had enough time to recalibrate and adjust various settings for smooth operation.

Take the vehicle on a drive that covers a mix of conditions, including city streets and highways. Aim for a drive totaling 30-40 miles, which will allow the ECU to relearn fuel trims and performance memory effectively. Pay close attention to idle speed, engine lights, and overall drivability.

During the test drive, ensure that there are no warning lights on the dashboard, as this could indicate unresolved trouble codes. Additionally, check for any hesitations, stalling, or irregular idle, which might suggest further issues. If the car performs without any mechanical problems, the reset is likely successful, and the vehicle should be functioning within optimal parameters.

For more guidance on resetting and troubleshooting ECU issues, consider consulting the experts at Module Mechanics. They specialize in ECU Tuning & Fuel Management, offering reliable solutions to enhance your vehicle’s performance.

Understand the Relearning Phase Post-Reset

After resetting the ECU of a Honda Civic, the vehicle enters a relearning phase. During this time, the ECU adjusts to your driving habits to optimize performance, fuel efficiency, and emission levels. It’s crucial to drive normally for about 30-40 miles to help the system collect accurate data for these adjustments.

Initially, you might notice irregular engine idle or other minor fluctuations as the ECU recalibrates. This period allows it to reset parameters such as fuel trims, idle speed, and throttle response. Avoid making any mechanical changes like replacing the air filter or fuel filter during this phase, as alterations might interfere with the adjustment process.

To facilitate a smooth relearning phase, keep these tips in mind:

  • Allow the engine to warm up for a few minutes before driving.
  • Use a full tank of gas to prevent interruptions.
  • Consider using a bottle of fuel injector cleaner to ensure efficiency.

Understanding this relearning process is essential for maintaining optimal vehicle performance. For expert guidance or ECU troubleshooting, visit Module Mechanics. Our professionals offer top-notch ECU tuning & fuel management services to ensure your Honda Civic runs smoothly and efficiently.

Frequently Asked Questions

How often should you reset your ECU?

Resetting your ECU is not a regular maintenance task and should only be done when necessary. This is typically recommended when addressing specific issues such as persistent check engine lights, trouble codes, or after significant repairs affecting engine performance. Unnecessary resets may lead to poor initial vehicle performance while the ECU relearns.

Can resetting the ECU fix engine performance issues?

Yes, resetting the ECU can sometimes resolve engine performance issues. It can clear error codes and reset performance memory, potentially addressing problems like rough idle or detonation. However, it won’t fix underlying mechanical problems, and it’s best to use it as a diagnostic step rather than a cure-all solution.

Will resetting the ECU erase all saved settings?

Resetting the ECU will erase data related to fuel trims, idle speed, and throttle response, bringing the system back to factory defaults. However, it doesn’t affect hard-coded settings or personal preferences unrelated to engine performance. After a reset, the vehicle needs a few miles of driving to recalibrate and optimize parameters for your driving style.

Is it necessary to disconnect the battery before a reset?

Yes, disconnecting the negative battery terminal is a common method to reset the ECU. This action cuts power and clears stored data in the ECU. Ensure the vehicle is off before disconnecting the battery to avoid electrical issues. Leaving the battery disconnected for about a couple of hours ensures the ECU resets fully.

What to do if resetting the ECU doesn’t solve the problem?

If resetting the ECU doesn’t resolve your problem, further diagnostics are needed. Check for mechanical issues or speak with a professional for advanced troubleshooting. Visiting Module Mechanics can be a great next step. Our team specializes in ECU tuning & fuel management, offering thorough inspections and solutions to keep your Honda Civic performing optimally.

How often should you reset your ECU?

Resetting your Honda Civic’s ECU can be a useful strategy for addressing minor issues or improving performance. However, it should not be done too frequently. Generally, it’s advisable to reset your ECU when you’ve made significant changes to your vehicle’s components, such as the air filter, fuel filter, or gas pedal sensors. Additionally, a reset may be necessary if you suspect incorrect fuel trims or need to clear engine trouble codes.

Frequent resetting may disrupt the performance memory of your ECU, leading to potential mechanical problems and causing your car to operate inefficiently. Typically, a reset might be considered every couple of months or after driving a couple of laps where issues persist. It’s also suitable when you’ve replaced a tank of gas or used a fuel injector cleaner.

Consistently resetting the ECU without reason can disrupt the smooth operation of your vehicle, altering its idle speed or initializing standby mode unnecessarily. Instead, focus on regular maintenance and observe whether warning lights appear. For persistent issues, consult professionals to avoid underlying problems in your Honda Civic’s ECU or other systems.

How to Reset the Instrument Cluster on Ford Vehicles

Is your Ford’s instrument cluster behaving erratically? This frustrating situation can lead to confusion about your vehicle’s health and performance. Understanding how to troubleshoot and reset the instrument cluster in Ford vehicles is crucial for maintaining accuracy and functionality.

Instrument clusters provide essential information regarding your vehicle’s speed, fuel levels, and diagnostic warnings, making them a vital component for safe driving. A malfunctioning instrument cluster might stem from various issues, ranging from simple electrical problems to more complex malfunctions. Recognizing the signs of trouble is the first step towards determining whether to repair or replace the unit.

In this article, we will guide you through the process of resetting the instrument cluster on Ford vehicles, including the tools you need, detailed steps, and when to seek professional assistance.

Recognize the signs of instrument cluster malfunction

Recognizing the signs of a malfunctioning instrument cluster in your Ford vehicle is critical for ensuring a safe and functional driving experience. Pay attention to these common indicators:

  • Dashboard Lights: Warning lights or gauges that flicker, dim, or completely fail to illuminate could signal an issue.
  • Fuel Gauge: Inaccuracy or erratic behavior of the fuel gauge may suggest a defective instrument cluster.
  • Unrelated Indicators: When indicators unrelated to the vehicle’s current operation illuminate, it’s a cause for concern.
  • Entire Cluster: If the entire cluster is non-responsive, it could indicate a more serious electrical problem.
  • Blown Fuse: Sometimes, a simple blown fuse can disrupt the working of the cluster.
  • Ignition Key: Difficulty with the cluster only when the ignition key is turned could reveal a connection issue.

Understand the importance of replacement vs. repair

When it comes to the Ford Instrument Cluster, which is essentially the hub of vehicle feedback for drivers, understanding the importance of replacement versus repair is key. A defective instrument cluster can manifest in unlit dashboard lights, inaccurate fuel gauge readings, or unrelated indicators flickering. Addressing these issues promptly is crucial for road safety and to maintain vehicle performance.

Replacement vs. Repair:

  • Cost: Replacement can be significantly more costly than repair services, with entire gauge clusters being a considerable investment.
  • Time: Repairing a Ford Instrument Cluster is usually quicker than sourcing and installing a replacement cluster, minimizing vehicle downtime.
  • Vehicle Integrity: Repair allows the retention of the original cluster, preserving the factory settings and avoiding potential mismatches in mileage and data with a replacement cluster.
  • Customization: Repairs can often accommodate customization or upgrades, such as LED conversions for cluster lights.
  • Sustainability: Repairing rather than replacing is an eco-friendlier option, reducing waste and the need for manufacturing new parts.

In light of these points, it’s advantageous to seek the expertise of specialists who offer professional repair services for Ford Instrument Clusters. Their thorough approach ensures all electrical connections are checked, and any deep scratches or other issues are resolved without the need for a full cluster replacement.

Gather necessary tools for resetting the instrument cluster

Before attempting to reset your Ford Instrument Cluster, it’s important to have all the necessary tools at hand to ensure the process goes smoothly and safely. Proper tools not only make the task easier but also prevent damage to the vehicle’s interior and the instrument cluster itself. Ready your workspace by gathering the following:

  • A trim panel removal tool
  • Various screwdrivers and socket
  • A digital multimeter

Having these tools ready and available will help you adeptly navigate the resetting process of your Ford Instrument Cluster. If this process seems daunting or you’re worried about causing further issues, remember that Module Mechanics has the expertise to handle these adjustments for you professionally.

Trim panel tool

When working on your Ford Instrument Cluster, the initial step often involves removing the trim panel that encases the cluster. To do this without causing damage to your dashboard, a trim panel removal tool is essential. This specialized tool is designed to help you pry open the trim with ease, preventing cracks and unsightly pry marks that can occur when using makeshift implements. It’s an inexpensive investment that safeguards the aesthetic integrity of your car’s interior.

Screwdrivers and sockets

Once the trim is removed, you’ll likely need a set of reliable screwdrivers and sockets to detach the instrument cluster from the dashboard. Typically, a range of Phillips and flathead screwdrivers as well as a socket set will cover the various fasteners that hold the cluster in place. It’s important to use the correct size to avoid stripping the screws. Always match the tool to the fastener head snugly to maintain the integrity of your hardware.

Digital multimeter

A digital multimeter is a must-have for diagnosing electrical issues within the instrument cluster. It’s used to check for continuity and ensure that power is reaching the cluster as it should be. If the resetting process is part of troubleshooting a deeper problem, a multimeter will prove invaluable in pinpointing faults within the electrical connections. Understanding how to properly use a multimeter is crucial, but if it seems outside your comfort zone, reach out to Module Mechanics for diagnosing and resolving complex instrument cluster issues.

Steps to reset the instrument cluster

If you’re experiencing issues with your Ford’s instrument cluster, such as irregular readings from the fuel gauge, unclear dashboard lights, or inoperative gauges, a reset can often clear up these problems. Here are the essential steps to reset your Ford’s instrument cluster:

  1. Ignition Key Method:
  • Ensure all doors are closed.
  • Insert the ignition key and turn it to the ‘On’ position but do not start the engine.
  • Press and hold the RESET button, usually located on the instrument panel.
  • Keep the RESET button pressed for a few seconds until the instrument cluster lights up and resets.
  • Once reset, turn the ignition key to the ‘Off’ position.
  1. Battery Disconnection Technique:
  • Locate the vehicle’s battery.
  • Disconnect the negative battery cable.
  • Wait for approximately 15 minutes.
  • Reconnect the negative battery cable.
  • The instrument cluster should reset once the ignition is turned back on.

If you’ve tried all the steps to reset your instrument cluster and the issues persist, there might be a deeper problem, such as a blown fuse, defective instrument cluster, or poor electrical connections. For a professional touch, consider Module Mechanics, specialists in instrument cluster repairs for Ford vehicles. To avoid buying an entire replacement cluster, we can help you diagnose and repair it. Just send us a message, call us at +1 (800) 571-3424 or simply visit our shop, search for your car brand and model and place an order.

FAQs

When it comes to maintaining and troubleshooting the instrument cluster in your Ford vehicle, you might have questions about programming, calibration, testing, and monitoring warning lights. Below are frequently asked questions that Ford owners often have regarding their vehicle’s instrument cluster.

Does a Ford instrument cluster need to be programmed?

Absolutely. When replacing the instrument cluster or sometimes even after a battery disconnect, it is essential that the new or existing Ford Instrument Cluster be programmed. This programming process ensures that the cluster accurately reflects the mileage and communicates correctly with the vehicle’s computer systems. Without proper programming, you may face issues with vehicle functionality and inaccurate readings. Module Mechanics can expertly handle the programming of your Ford Instrument Cluster, making sure your new or recalibrated cluster is perfectly synergized with your vehicle.

How do you calibrate an instrument cluster?

Calibrating an instrument cluster involves adjusting the gauges and indicators to ensure accurate readings. Here’s a general overview of the process:

  1. Enter the calibration mode, typically by pressing and holding a specific button on the cluster while turning the ignition key.
  2. Follow the on-screen prompts or guide, which may include driving the vehicle to set the speedometer, filling the fuel tank to calibrate the fuel gauge, or adjusting the tachometer according to engine RPMs.
  3. Confirm and save the new calibration settings.

It’s worth noting that calibration methods can vary depending on the model and year of your Ford vehicle. Module Mechanics provides professional calibration services to ensure your instrument cluster gives accurate readings at all times.

How do I test my instrument cluster?

Testing the instrument cluster to identify any potential issues involves several steps:

  1. Start your vehicle and observe if all the dashboard lights illuminate briefly as a self-test.
  2. Watch for any dashboard lights that stay on longer than usual.
  3. Check for the responsiveness of gauges by monitoring the fuel gauge, speedometer, tachometer, and temperature gauge.
  4. Look out for flickering lights or intermittent gauge movements, which can indicate a problem.

Should you detect any irregularities, it’s best to have your cluster examined by the professionals at Module Mechanics for a comprehensive assessment.

Are there any warning lights I should monitor related to the instrument cluster?

Yes, there are a few key warning lights that are directly related to the operability and functionality of the instrument cluster:

  • Battery Light: Can indicate an issue with the vehicle’s electrical system, which includes the instrument cluster.
  • Brake System Warning Light: While primarily for the brake system, it could also signal an electrical fault, including the instrument cluster.
  • Check Engine Light: A lit check engine light can sometimes be related to a communication error that affects the instrument cluster.

Monitoring these lights can provide early indicators of potential problems with the instrument cluster. If any of these lights remain illuminated or flash erratically, it is advisable to contact Module Mechanics for professional advice and service. We can help diagnose and rectify any issues to prevent further vehicle complications.

Will Changing the Instrument Cluster Impact Your Mileage?

Have you ever considered how an instrument cluster can influence your driving experience? The instrument cluster serves as the vehicle’s control center, providing essential information that can affect everything from speed to fuel efficiency. With advancements in technology, many drivers are now opting for custom or replacement clusters, but this decision may involve more than just aesthetics.

Traditional analog displays are giving way to modern digital counterparts, each with its advantages and disadvantages. While some may seek a more personalized look, others may find themselves wondering if changing the instrument cluster could impact their vehicle’s mileage or overall performance, particularly in terms of adherence to automaker specifications and diagnostics.

In this article, we will explore the implications of changing instrument clusters, including potential drawbacks such as accuracy and driver distraction. Additionally, we’ll highlight how the services offered at Module Mechanix can help ensure that your vehicle modifications best suit your needs without compromising on performance.

Understanding Instrument Clusters

Understanding Instrument Clusters can be crucial when it comes to maintaining the accurate functionality of your vehicle. The instrument cluster, often referred to as the gauge cluster, serves as the central hub for your vehicle’s information, providing the driver with essential data at a glance. This data typically includes the current speed, fuel level, engine’s RPM, and importantly, the odometer reading, which tracks the vehicle’s total mileage.

Identifying issues with your instrument cluster is essential for ensuring that your vehicle’s data is reliable and correct. Symptoms like dead pixels, problematic fuel gauges, or a completely non-functional cluster can signal that a repair or replacement is necessary. It is here where a key question arises: will changing the instrument cluster change the mileage reading?

What is an instrument cluster?

An instrument cluster is the assembly in a vehicle’s dashboard that houses various indicators and gauges, such as the speedometer, tachometer, fuel gauge, and warning indicators for system malfunctions. Modern vehicles may also incorporate digital displays that provide more detailed information and allow the driver to customize the information displayed. The instrument cluster is connected to the vehicle’s sensors and the engine control unit (ECU) or the body control module (BCM), which communicate the vehicle’s performance data to be displayed.

This cluster is not just crucial for the driver’s awareness but is also integral to the vehicle’s service record and valuation, given that the odometer reading reflects the actual mileage of the vehicle – an essential factor in its resale value and for understanding its life expectancy.

Traditional Analog vs. Digital Instrument Clusters

Delineating between traditional analog and modern digital instrument clusters reveals significant differences in style and functionality. Traditional analog clusters use physical gauges with needles that point to numbers representing various measurements. They are known for the classic look and the simplicity in design. Digital clusters, on the other hand, use screens to display similar information in a more customizable and often more visually rich format. They can offer enhanced interaction with the vehicle’s systems and more detailed information delivery.

Traditional Analog ClustersDigital Instrument Clusters
Physical gauges and needlesDigital screens and displays
Classic and simple designModern and customizable interface
Limited information deliveryExtensive information delivery
Mechanical components (cables, gears)Digital signals (circuit boards, displays)
Less prone to customizationHigh degree of customization possible

In terms of repair and replacement, the shift from analog to digital clusters has had an impact on how these services are provided. For instance, an analog cluster might need mechanical repairs or recalibration, while a digital one might need a new solder joint, circuit board repair, or software update.

Will Changing the Instrument Cluster Impact Your Mileage?

When a vehicle instrument cluster is replaced or repaired, care must be taken to preserve or restore the original mileage, regardless of the type of cluster. The actual mileage of a vehicle should remain consistent, even if the current cluster has been changed, to maintain the authenticity of the vehicle’s usage history. The real mileage is often stored in the vehicle’s ECU or BCM, which means that even with a replacement cluster, there are ways to retain or restore the true mileage to display accurately.

It’s important to understand these nuances because inaccurate mileage can lead to legal issues, impact resale value, and affect smog checks and service records. This is why professional repair shops, like Module Mechanics, are crucial for ensuring that your vehicle’s cluster is serviced correctly, with accurate mileage shown.

Module Mechanics, an expert in instrument cluster repair services, understands the significance of maintaining the correct mileage on your vehicle’s odometer. Our team ensures that, whether you’re dealing with a modern vehicle’s digital display or a classic style cluster, the true mileage of your vehicle is preserved. We can provide solutions for a wide range of issues – whether it involves dead pixels on a digital display or repairing a traditional analog gauge. Trusting your vehicle with Module Mechanics means you’re relying on a service that comprehensively understands the intricacies of instrument cluster repair and the importance of maintaining your service record with the actual mileage clearly intact. Visit ModuleMechanics.com to find out more about our expertise and how we can be of service to your vehicle’s instrumentation needs.